How To Connect Soundbar To Hisense Roku TV? [Step-By-Step]
Soundbars offer a better audio experience compared to TV speakers. But you have to connect them first. Wondering how to connect your new soundbar to your Hisense Roku TV?
It turns out that there are different options to connect both devices. We will cover these methods in this post. We will also provide a step-by-step guide to have your soundbar working in no time.
The model of your soundbar determines the ways you can connect. At a glance, the different connection options are:
Using an Optical Cable
Connection through Bluetooth
Using an HDMI cable
Connection through AV Cable
Using a 3.5 mm Jack
Connection over Wi-Fi network
Now let’s dive into the details.
How To Connect Soundbar To Hisense Roku TV With Optical Cable?
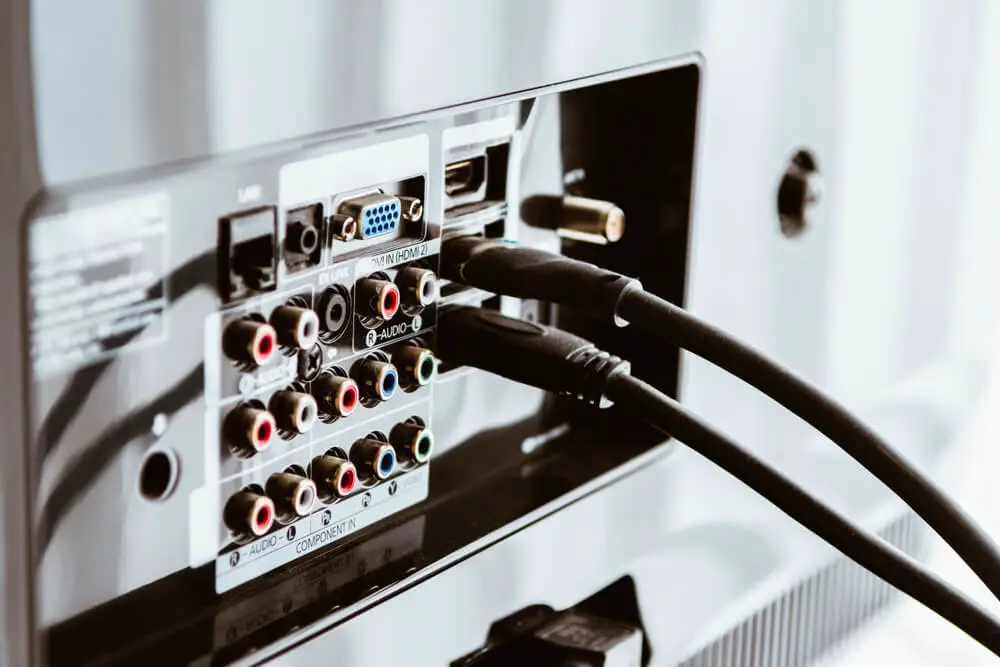
One of the easy ways to connect to your Hisense Roku TV is through the optical audio input. This ensures that you get a pleasant listening experience from your Hisense TV.
You will find an optical audio port at the back of your Roku TV. It allows you to pass audio to connected external devices. To do this, follow these steps:
Step 1: Connect the Optical Cable to your TV’s Port.
Most soundbars come with an optical cable in the box. If your soundbar does not have one, you can purchase this cable from the nearest tech store. The first thing is to connect this cable to the optical-out port on your TV.
You will find the word ‘optical’ written beside this port. Your connection should be firm if you want the best sound quality.
Step 2: Connect the Optical Cable to your Soundbar.
The next step is to connect the optical cable to the port on your soundbar. To do this, connect the other end of the cable to the optical-in port on your soundbar. Again, you should ensure that there is a firm connection.
You can now complete the configuration with your TV remote.
Step 3: Use TV Remote to Change your settings.
This is the final step in the process. To get your TV audio from your soundbar:
Use your TV remote to navigate to settings.
On the settings tab, click on sound settings.
Click on the sound output option.
Change from TV speakers to optical connection.
And that’s it! Your soundbar will now play the audio from your Hisense Roku TV.
How To Connect Soundbar To Hisense Roku TV via Bluetooth?
If you hate the clutter of wires, Bluetooth is your best bet. Connecting through Bluetooth allows you to have a clean wireless setup. But this requires your soundbar and TV to have Bluetooth functionality.
There’s also another catch- the sound quality won’t be as great as that from an HDMI connection. To connect through Bluetooth, follow these steps:
Step 1: Turn on the Bluetooth on your Soundbar.
To connect your soundbar to your TV, turn on the Bluetooth on the soundbar. You will find a Bluetooth button on the soundbar. Press this, and you should see the indicator come on.
Now it’s time to put the device in pairing mode. It is usually done by holding the Bluetooth button. Your soundbar manual is the best place to find pairing instructions.
Step 2: Turn on Bluetooth on your TV.
With your soundbar in pairing mode, it is time to turn your attention to your Hisense TV. Use your remote control to navigate to TV settings. Next, select the Bluetooth option and toggle it to turn it on.
Step 3: Pair both Soundbar and TV.
Your TV will scan for available Bluetooth devices. Select your soundbar from the available list and click to pair. After pairing both devices, perform a quick test by playing content on your TV. You can re-connect if there are any problems.
And that’s all.
What if your TV has no Bluetooth built-in?
Relax, there’s a way around this. But you’ll need to add a Bluetooth receiver to your shopping list.
Start by connecting the Bluetooth receiver to the RCA output on your TV. Most receivers need a power supply. You can also purchase receivers with a rechargeable battery.
With the receiver plugged into the TV, turn on Bluetooth on your soundbar. Then, continue with the steps above to pair your soundbar with your Hisense Roku TV.
Now you can enjoy a wireless connection and a better audio experience.
How To Connect Soundbar To Hisense Roku TV using HDMI?
This is usually the best way to connect your soundbar to your TV. But you need to have an HDMI arc port on your Hisense Roku TV. The term “arc” means audio return channel. This allows the sound from your Roku TV to play through the soundbar.
Connecting through the HDMI arc port allows your soundbar to do the heavy lifting. You also get to customize your soundbar to any content on your Hisense Roku TV.
You will often find an HDMI cord in the box of your soundbar. To connect your soundbar to your TV, follow these steps:
Step 1: Turn off both TV and Soundbar.
It is best to turn off your TV to avoid any connection problems. You should also turn off the soundbar before starting any connection. Now, you are ready to connect.
Step 2: Connect your HDMI Cable to the Soundbar.
The next step is to connect your HDMI cable to your soundbar. You will find the HDMI arc port at the back of your soundbar. Connect one end of the HDMI cable to the port.
It is important to have a firm connection to avoid any connection-related problems.
Step 3: Connect HDMI Cable to TV.
This step requires you to connect the other end of your HDMI cord to the HDMI arc port on your TV. You will find the arc port on the sides of your TV. Ensure that there is a secure connection between both devices.
Step 4: Adjust the Settings on your TV.
Now that there is a connection, it’s time to turn on your TV and soundbar. To adjust settings:
Use your TV remote to go into the settings menu.
Go to the “system” option.
Navigate to the “control other devices” section.
Enable the “ARC (HDMI 3)” function by clicking on the box.
Enable the “system audio control” option
Go back to the home menu
You will find that the sound from your TV is now coming from your soundbar. By enabling “system audio control,” you will control volume levels with your TV remote.
If you do not have an HDMI arc port, you have to connect two cables. First, connect the HDMI cable through the regular HDMI port. Next, connect an optical cable to your TV and soundbar.
To access your TV speakers, you have to disable the HDMI connection.
What if I want the best audio performance from my soundbar?
You will have to go back into settings to get the best sound performance. Roku TV allows access to different streaming platforms. So most content will support surround audio from Dolby Digital or DTS.
Follow these steps to get a cinema-like experience:
Navigate to your TV settings.
Click on the “audio.”
Click on the “HDMI” option.
Set your HDMI to “Dolby D+ or DTS.”
Go back to “audio mode.”
Set the mode to “Dolby D+ or DTS.”
Go back to the home screen.
Now you can get surround sound benefits when streaming Netflix.
How To Connect Soundbar To Roku TV With AV Cable?
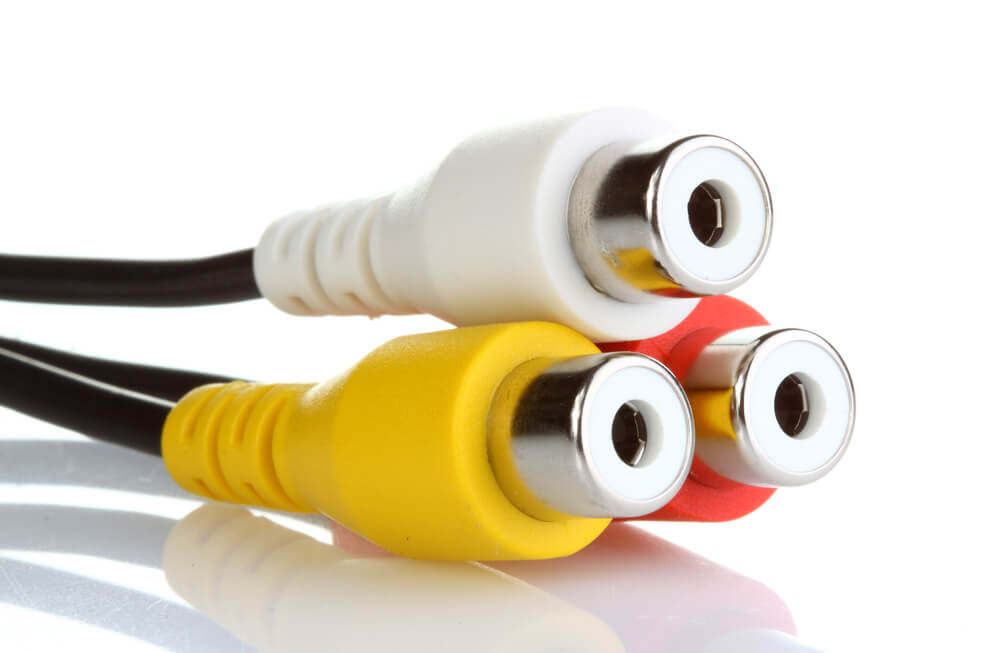
If your soundbar uses the older RCA inputs, this can be a bit of a snag. For your TV to work with your soundbar, you need an audio output port and an audio input port. The audio outputs on your TV are the HDMI arc and the optical port.
Connecting your soundbar with an AV cable can be a little tricky. But there are steps to help you with this connection.
Step 1: Confirm that your TV has Output Ports.
If you have an older TV, it is important to check that it has an RCA output port. This is the only way it can transmit audio to your soundbar. You also need to ensure that your RCA cable has an output point.
The good news is that most soundbars can take a two-channel audio configuration. So you can connect with an RCA cable. Getting a Monoprice Premium 2 RCA Plug can also help to remove any guesswork. This cable comes with only two audio inputs- red and white.
Step 2: Connect the AV cable to your TV.
If you have an older TV, connect the red and white cable to the audio outputs on the TV. This allows the TV to pass audio to the soundbar. This connection must be firm.
Step 3: Connect AV Cable to your Soundbar.
The next step is to connect the input end of your cables to your soundbar. Both the red and white cables go directly into the soundbar. Again, this connection must be tight.
And that’s it. You should now receive audio from your soundbar. Keep in mind that this is for older TVs. If your Hisense Roku TV has an optical port or HDMI arc port, it is best to use them.
How to Connect Soundbar to Roku TV with 3.5 mm Jack
While this is not ideal, it is possible to connect through the 3.5 mm port. This works the same way you would connect wired headphones to a mobile device. Some soundbars and TVs have aux cable support.
To connect both devices, follow these steps:
Step 1: Check Soundbar and TV for 3.5 mm ports.
You need to confirm whether your devices support this connection. Begin by checking the back of your TV and soundbar for 3.5 mm ports. If you have them, you can then proceed to the next step.
Step 2: Connect a 3.5mm cable to your TV and Soundbar.
This is the easy part. Grab one end of the 3.5 mm cord and connect to your TV jack. You can use any 3.5 mm cord that comes with your headphones.
Now take the other end of the cable and connect to your soundbar. This method allows you to control the soundbar with your TV remote. Keep in mind that you will be losing out on audio quality.
How to Connect Soundbar to Roku TV with Shared Wi-Fi Connection
If you have a Hisense Roku TV, it is very likely that it supports a shared Wi-Fi connection. You can send audio signals over the internet to your soundbar. This allows you to have a wireless setup with your soundbar.
To connect over Wi-Fi, follow these steps:
Step 1: Connect Both Devices to Shared Wi-Fi Network.
Start this process by selecting a Wi-Fi network to connect both TV and soundbar. This can be the private network for your home. Connect your TV to this network by going into settings. Click on the network/connectivity option and select your Wi-Fi network.
Next, follow the instructions on your soundbar to connect it to your Wi-Fi network. Once there is a connection, you can move to the next step.
Step 2: Allow your TV to Recognize the Soundbar.
With both devices connected to your network, your TV needs to recognize the soundbar. Go into settings and click “control other devices.” Here you can add the soundbar to the list of devices recognized by your Roku TV.
Step 3: Adjust your TV settings.
The last step is to customize the settings of your TV. Go into the settings and make your soundbar the preferred speaker. This way, your TV audio comes from the soundbar.
Now you can enjoy a clean setup.
Wrap-Up
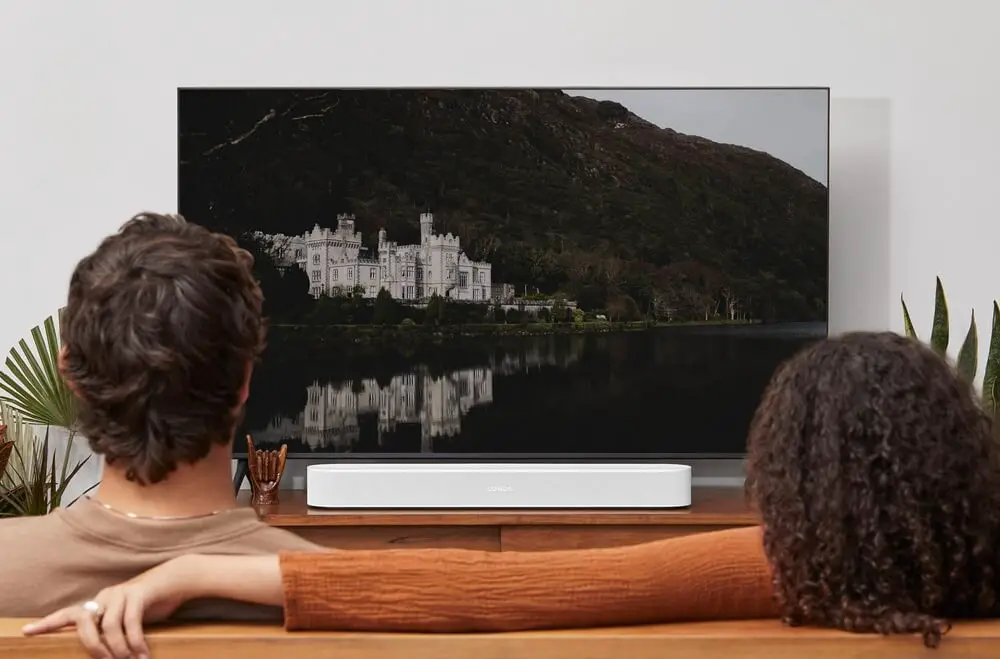
Soundbars allow you to bring the cinema experience home. But you will need to connect both devices first. While there are many ways to do this, using an HDMI cable gives the best audio performance.
You can connect your soundbar and TV by following the above steps. Keep in mind that there might be audio lags when using a wireless connection.
My name is Anita Jones, and my home cinema setup is my pride and joy.
I have created Cinema Equip to walk you through everything you need to know about making your own home cinema. From audio to picture quality, setup to troubleshooting, I have you covered.
So, what are you waiting for? Dive into my website and start planning for your very own cinema room!